Managing permissions directly for individual users can quickly become difficult as organizations grow. Security Groups provide a more efficient and scalable approach by allowing administrators to manage access through group membership rather than assigning permissions one user at a time.
In this article, we will demonstrate how to secure a SharePoint list using two Security Groups: Business Applications Owner, which receives Full Control permissions, and Business Applications Readers, which receives Read permissions. This approach helps organizations implement a simple, maintainable, and role-based access model for SharePoint lists.
Why Use Security Groups?
Managing access to SharePoint resources is an important aspect of maintaining security and governance within an organization. Rather than assigning permissions directly to individual users, Security Groups provide a centralized and scalable way to control access. By granting permissions to groups, administrators can simplify user management, reduce administrative effort, and ensure consistent access across business applications. In this article, we'll secure a SharePoint list using two groups: Business Applications Owner (Full Control) and Business Applications Readers (Read).
Prerequisites
Before you begin, make sure the following requirements are in place.
Requirement
Details
Need help with your business solution?
Our team can help you implement the right solution for your organization.
An active Microsoft 365 subscription with SharePoint Online enabled.
Admin Permissions
You need Global Administrator or SharePoint Administrator privileges in your tenant, along with the ability to create Security Groups in Microsoft 365.
SharePoint Site
An existing SharePoint site where the target list is hosted or will be created.
SharePoint List
A SharePoint list containing the data you want to protect. In our scenario, this is the Business Applications Access Registry list.
Users Identified
You should know which users will serve as group owners for the Business Applications Owner group and which will be group members for the Business Applications Readers group.
Step by Step Guide
Step 1: Create the SharePoint List
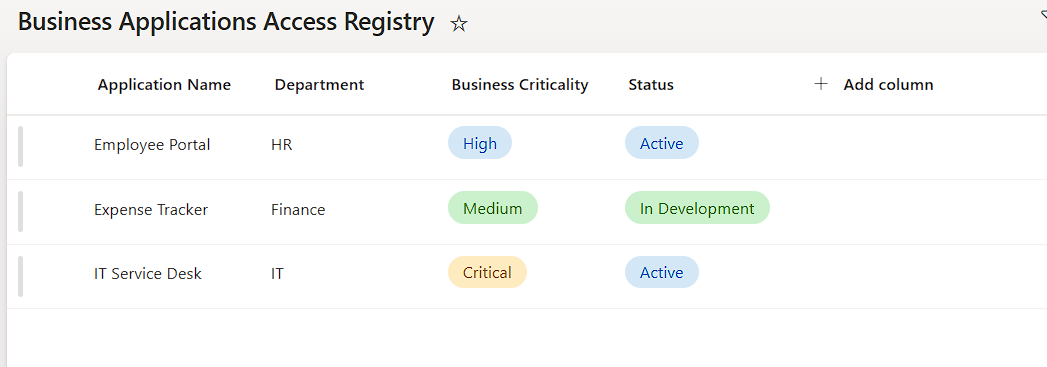
If you do not already have the list that needs to be secured, the first step is to create it. Navigate to your SharePoint site and create a new list. For this walkthrough, we will create a list called Business Applications Access Registry that stores application metadata for the organization.
Add the columns that are relevant to your business scenario. In our case, we will add columns for Application Name, Department, Business Criticality and Status. Once the columns are in place, add a few sample records so that you have data to work with when testing permissions later.
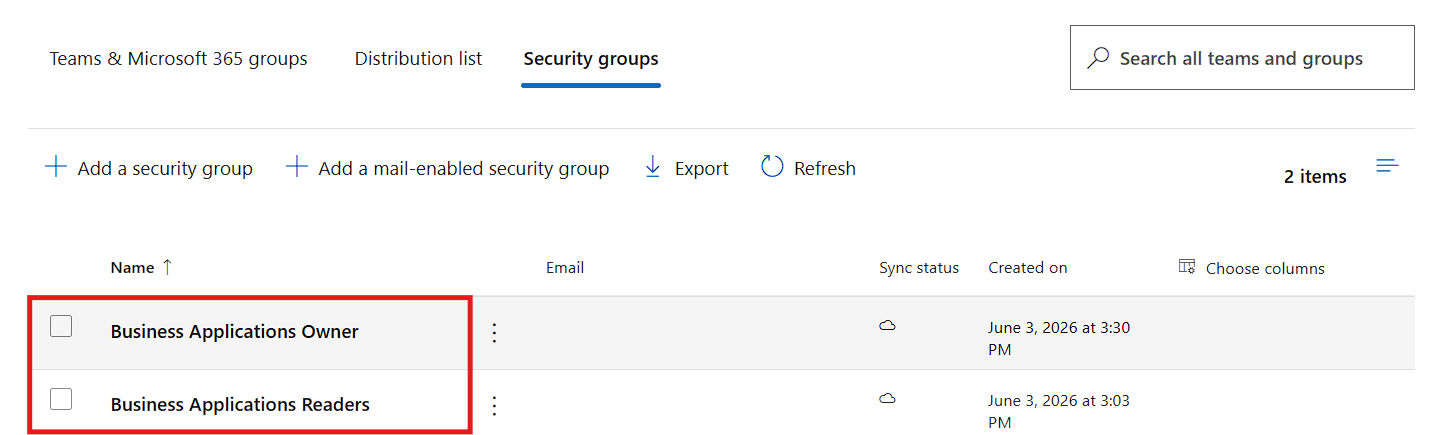
Step 2: Create Security Groups
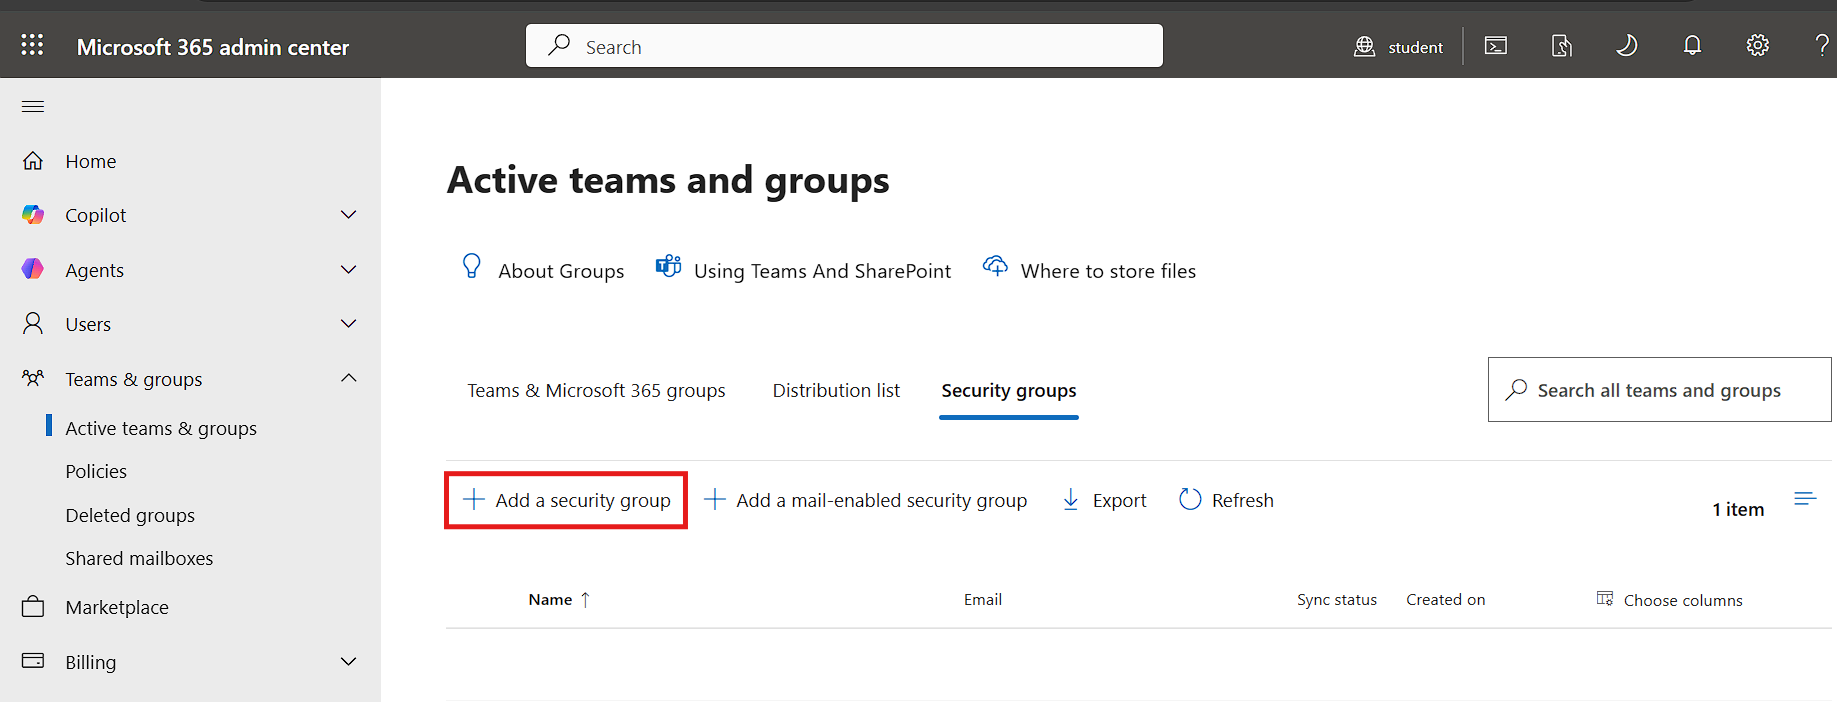
Open the Microsoft 365 admin center by navigating to admin.cloud.microsoft and signing in with your administrator account. From the left navigation, go to Groups and then select All groups. Click on New group to create the first security group, and then repeat the same process to create the second one.
Set the Group type to Security. Give each group a meaningful name that clearly identifies its purpose. In this walkthrough, the Full Control group is named Business Applications Owner and the read only group is named Business Applications Readers. Add a description such as Security group for managing access to the Business Applications Access Registry SharePoint list. Leave the Membership type set to Assigned since we will manually control who belongs to these groups.
Note: This article uses Microsoft Entra Security Groups. While Microsoft 365 Groups can also be granted SharePoint permissions, Security Groups are generally preferred when the primary objective is centralized access management across multiple business applications.
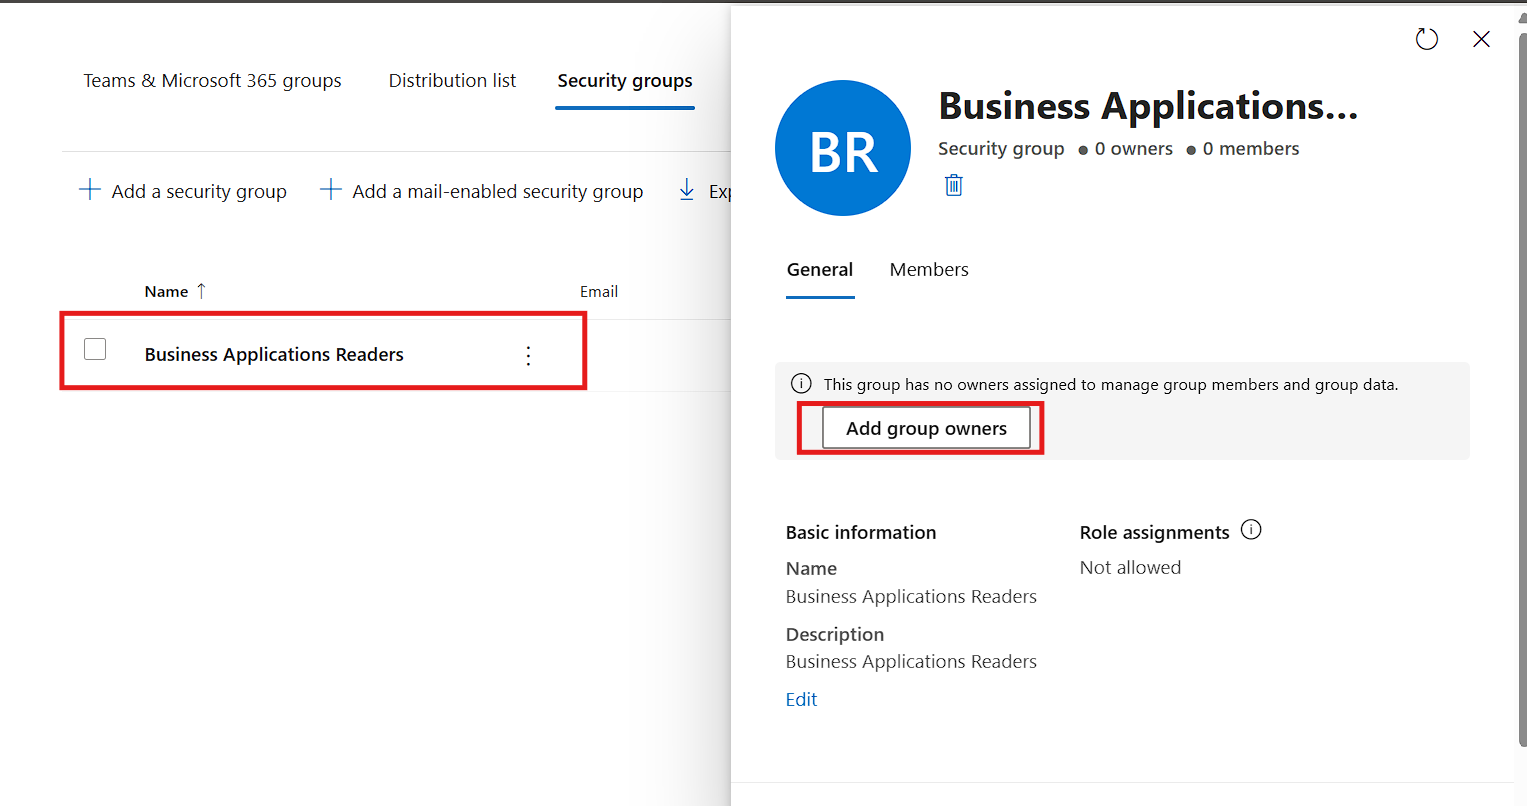
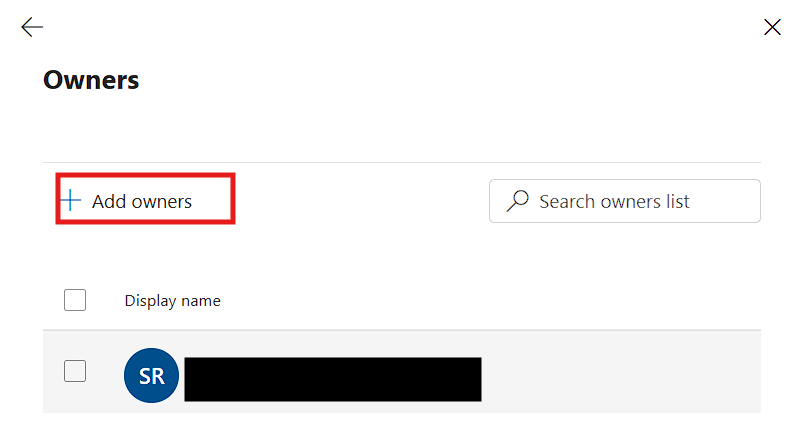
Step 3: Assign Group Owners
Group Owners are the people who will manage these groups going forward. They can add and remove members, but being an Owner of the security group does not automatically grant them any SharePoint permissions. That is handled separately.
Click on Add owners and select the users who should be responsible for managing group membership. In a typical setup, this would be the IT administrator and the business owner. For this scenario, add the users who will also serve as designated list administrators for the Business Applications Owner group.
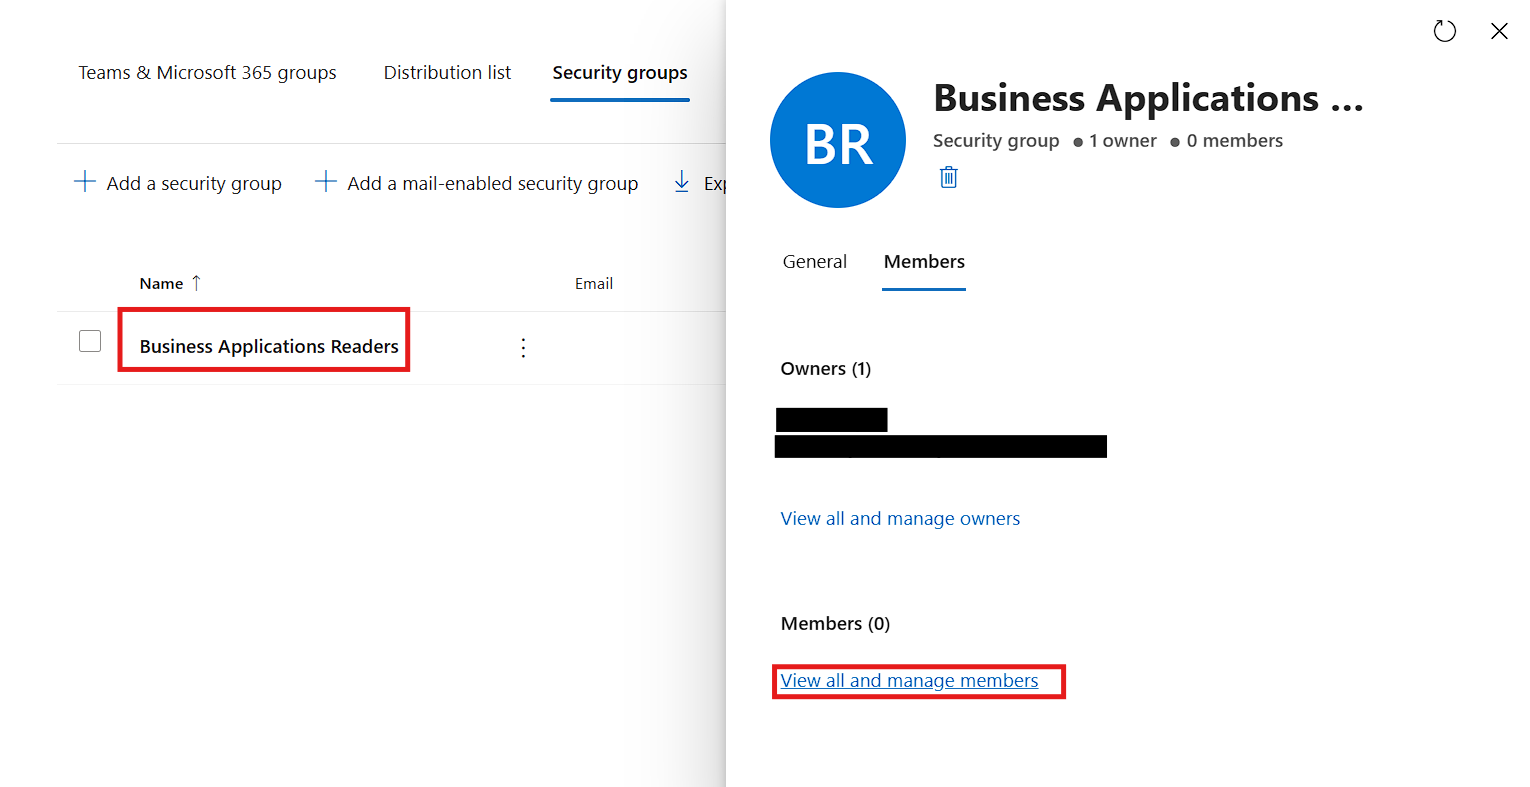
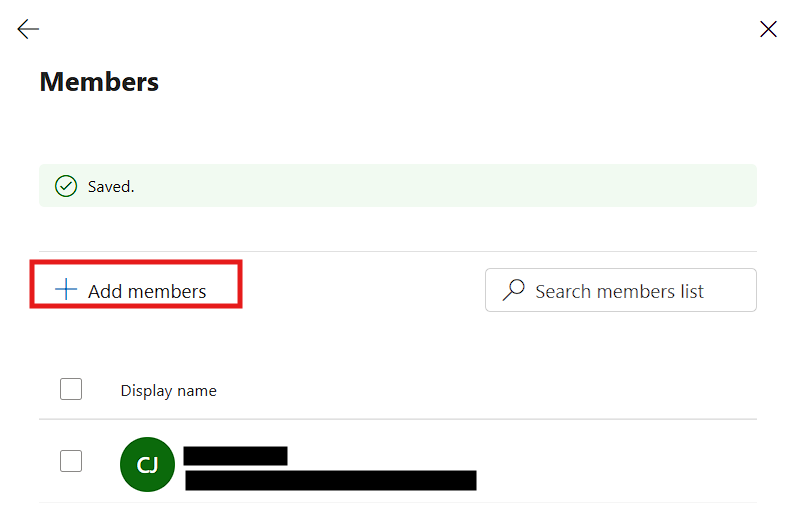
Step 4: Add Group Members
Next, navigate to the Members section of each security group. Members of Business Applications Owner are the users who will manage the SharePoint list, while members of Business Applications Readers are the users who will receive Read access. Click on Add members and select the employees who need the appropriate level of access.
In a production environment, Business Applications Readers could include an entire department or even all employees in the organization. The key benefit of using a security group is that when new employees join the company, the IT team simply adds them to the appropriate group, and they automatically receive the correct level of access to all resources tied to that group.
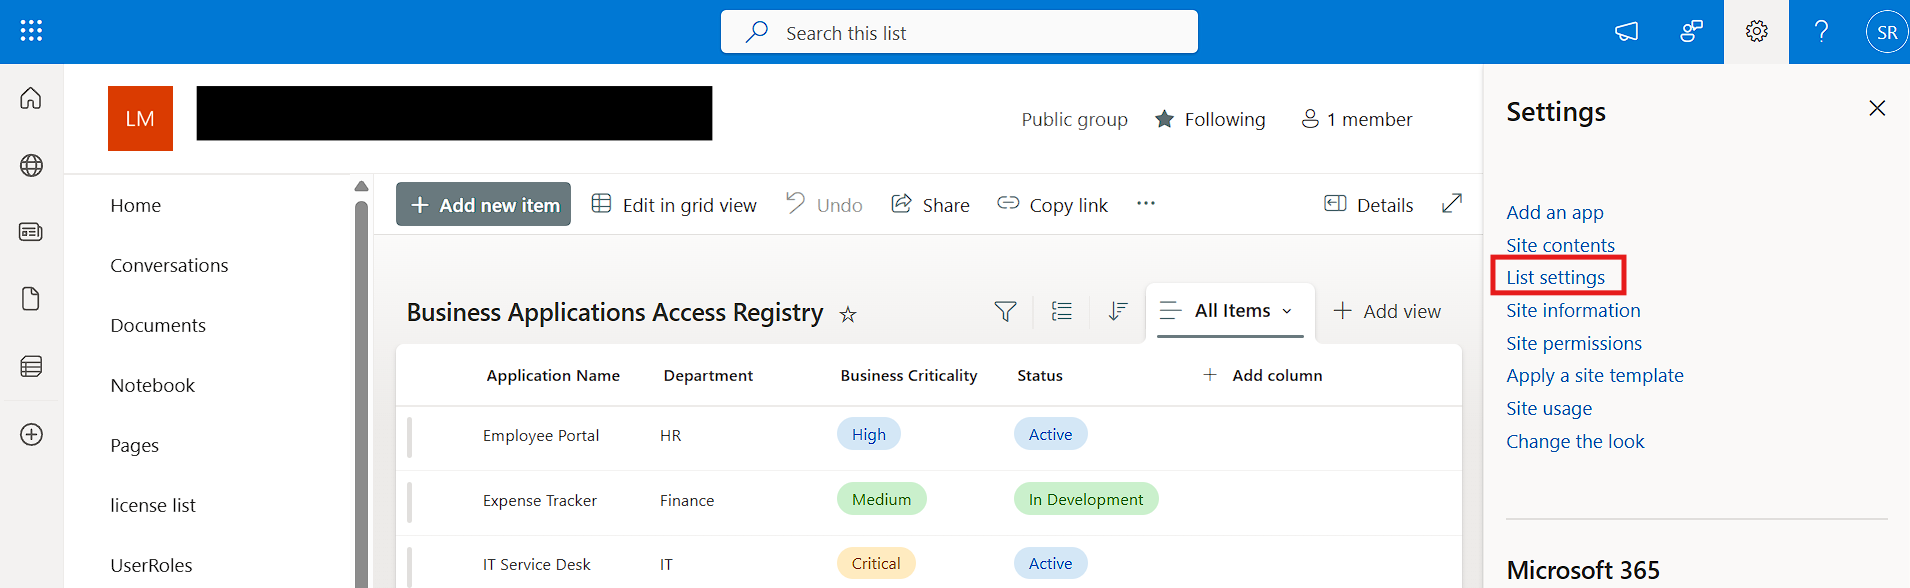
Step 5: Navigate to SharePoint List Permissions
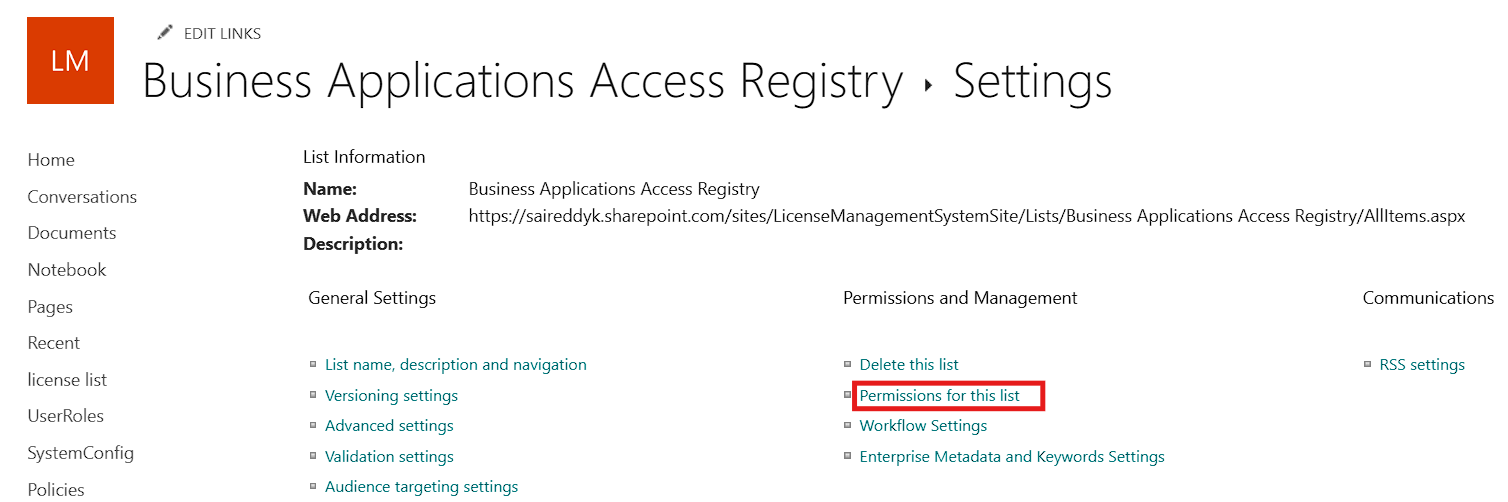
Now that the security groups are configured, go back to your SharePoint site and open the Business Applications Access Registry list. Click on the Settings gear icon in the top right corner and select List settings. On the List Settings page, look for the Permissions and Management section and click on Permissions for this list.
At this point, you will see that the list is inheriting permissions from its parent site. This is the default behavior in SharePoint, and it means that anyone who has access to the site also has the same level of access to this list. That is exactly what we need to change.
Step 6: Break Permission Inheritance
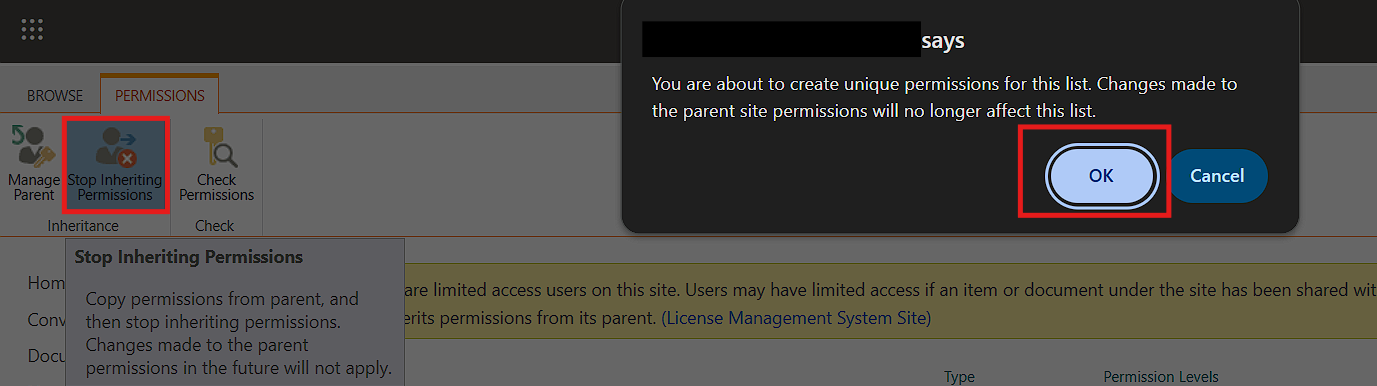
On the Permissions page, you will see a yellow banner at the top indicating that the list is inheriting permissions from its parent site. Click on the Stop Inheriting Permissions button in the ribbon. SharePoint will display a confirmation dialog warning you that this action will create unique permissions for the list. Click OK to proceed.
Once inheritance is broken, you will notice that the list now has its own copy of the parent site permissions. All the permission entries that were previously inherited are now listed as direct permissions on the list. This is an important step because breaking inheritance gives you full control over who can access this specific list, independent of the site level permissions.
Best Practice: Avoid creating unique permissions on large numbers of lists and libraries. Excessive unique permissions can make SharePoint administration, auditing, and troubleshooting significantly more complex.
Step 7: Remove Inherited Permission Entries
After breaking inheritance, the list still has all the permission entries that were copied from the parent site. These need to be cleaned up so that access is controlled exclusively through the security groups and the specific administrators you designate.
Before removing inherited permissions, ensure at least one administrative account retains Full Control access. This prevents accidental lockout scenarios. Be careful during this step. Make sure you do not remove your own access before you have finished configuring the new permissions. If you are a Site Collection Administrator, you will always retain access regardless of list level permissions, so this is generally safe to do while logged in with an admin account.
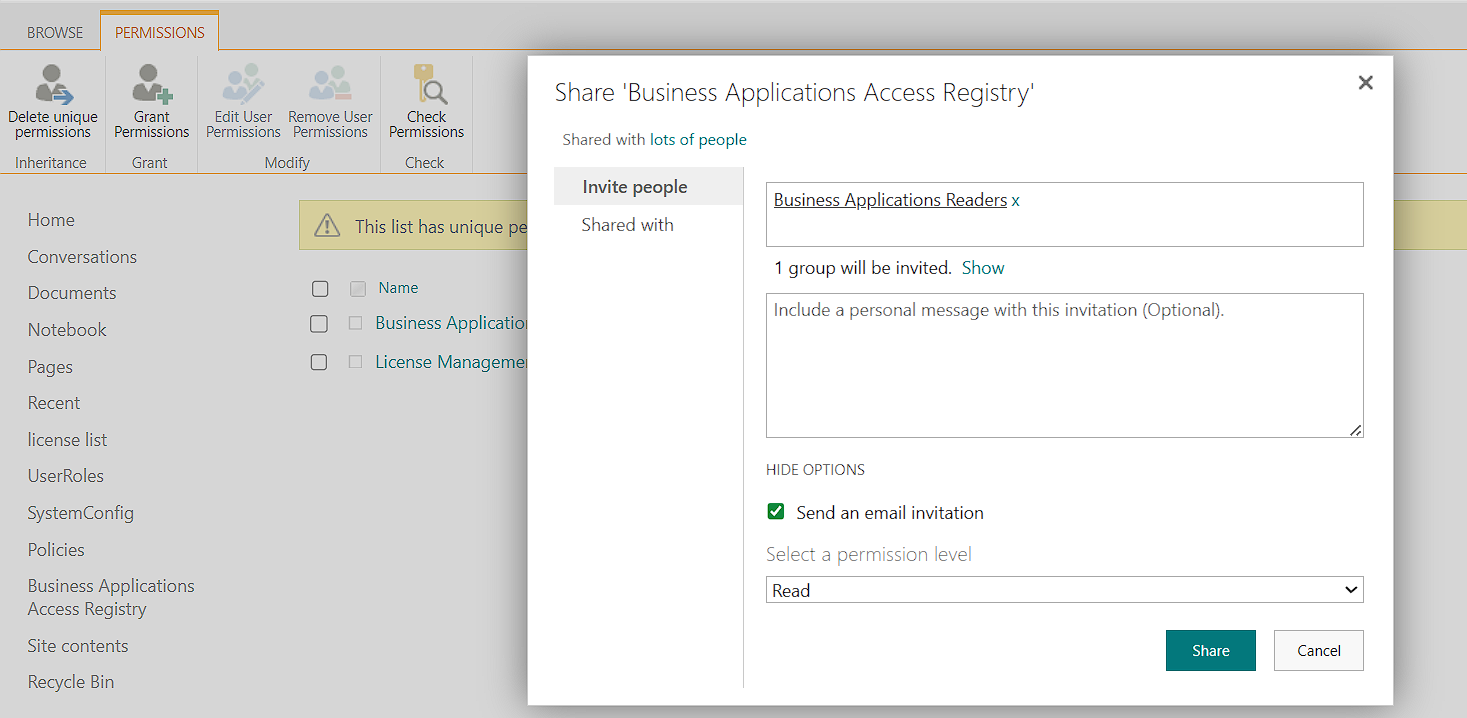
Step 8: Grant Permissions to the Security Groups
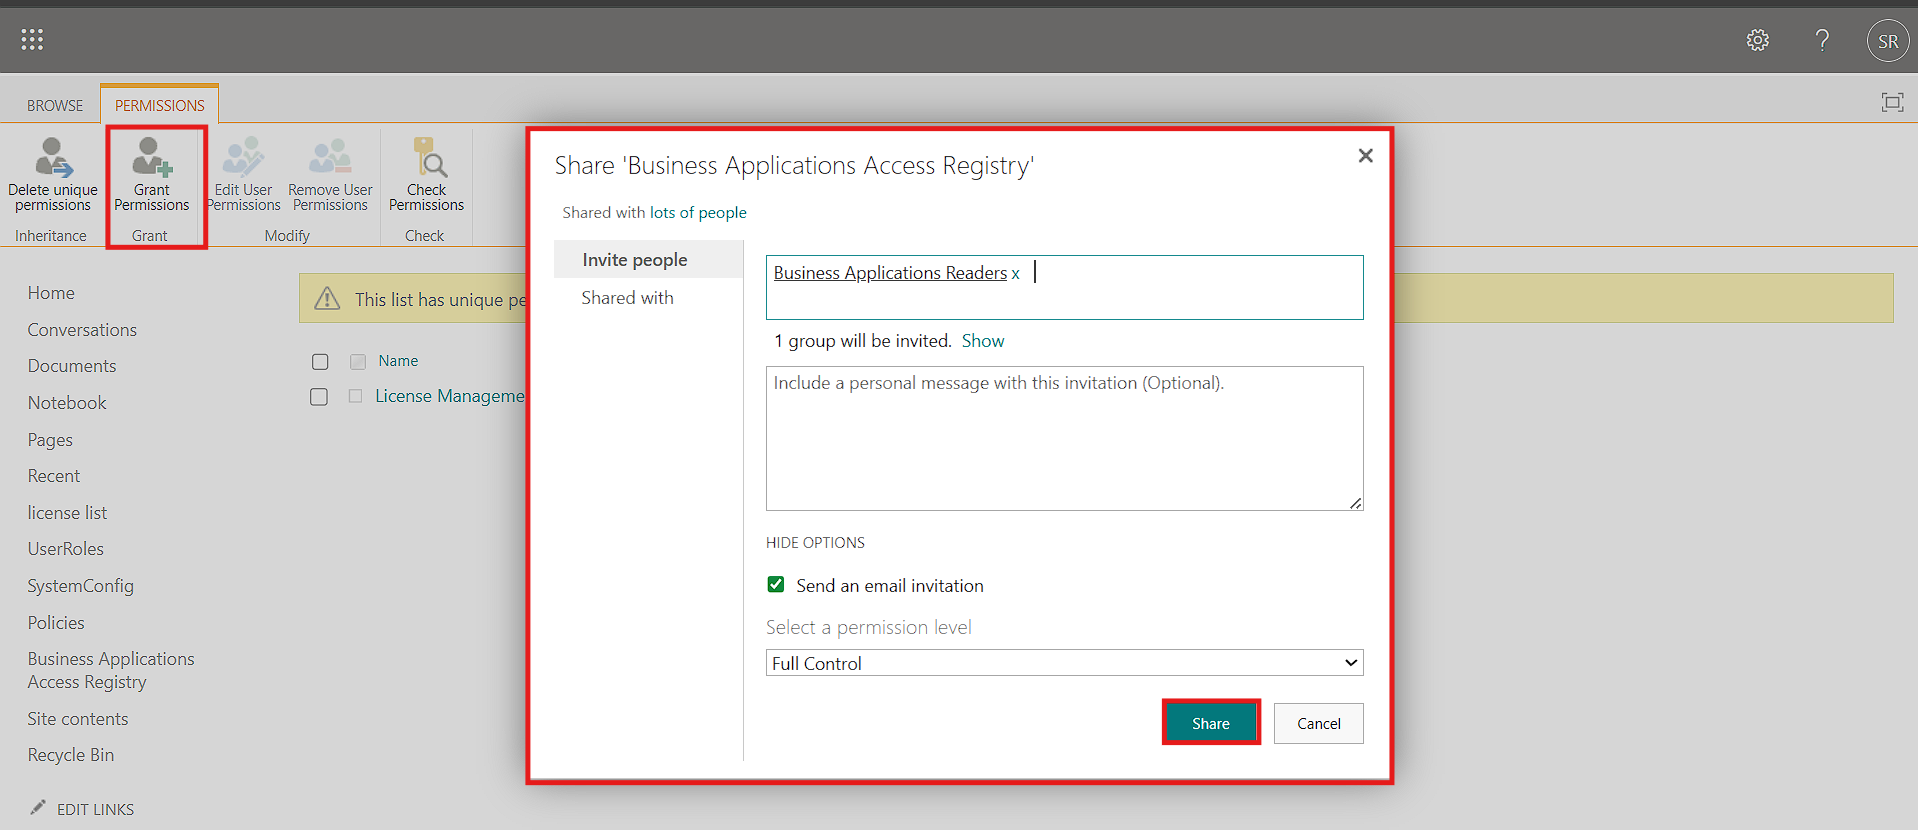
Now it is time to add the correct permissions. Click on Grant Permissions in the ribbon. In the Share dialog or permissions panel that appears, type the name or email address of the group that should have Full Control over this list. In this walkthrough, Business Applications Owner gets Full Control and Business Applications Readers gets Read.
Make sure to expand the permission level options and select Full Control for Business Applications Owner rather than the default Edit. Full Control allows the group to manage list settings, configure permissions, add and delete items, and perform all administrative actions on the list. Then grant Read to Business Applications Readers so that members can view the list without making changes.
When you click on the permission level dropdown in the Share dialog, SharePoint presents several built in permission levels. It is important to understand what each level allows before assigning it, because choosing the wrong level can either expose sensitive data to unintended modifications or block legitimate users from performing their tasks. The following table explains each permission level and when it is appropriate to use.
Permission Level
What It Allows
When to Use
Full Control
Complete authority over the list including managing permissions, configuring settings, creating and deleting items, and approving content.
Assign to list administrators and site owners who need unrestricted management access.
Design
Create lists and document libraries, edit pages, and apply themes or borders. Includes all capabilities of Edit plus layout and structural changes.
Rarely used at the list level. More relevant for site designers who need to modify page layouts.
Edit
Add, modify, and delete list items. Can also create and manage personal views of the list.
Suitable for users who need to work with list data on a regular basis but should not manage list settings or permissions.
Contribute
Add, edit, and delete list items. Suitable for users who need to maintain list content without managing settings or permissions.
Appropriate when users should be able to submit or update their own entries without affecting records created by other users.
Read
View list items and their properties. Can also open and download documents from document libraries. No ability to add, edit, or delete anything.
The right choice for users who only need to reference or look up information without making any changes.
Restricted View
View pages and list items only. Documents cannot be downloaded or opened in the browser. More limited than Read.
Use in scenarios where you want users to see that a record exists but do not want them to access attachments or download content.
In our scenario, we are assigning Full Control to the Business Applications Owner group because it is responsible for managing the Business Applications Access Registry list. Business Applications Readers will receive Read permissions in a later step, which allows them to view application records without any risk of accidental edits.
Step 9: Verify the Final Permission Configuration
After completing all the permission assignments, review the Permissions page for the list one final time. You should see a clean and well organized permission structure with only the entries you explicitly created.
The Business Applications Owner group should appear with Full Control. The Business Applications Readers group should appear with Read. There should be no leftover inherited entries or unexpected permission assignments.
To verify that the permissions are working correctly, log in as a user who is a Member of the Business Applications Readers group. When you navigate to the Business Applications Access Registry list, you should be able to see all the list items but the New, Edit, and Delete options should not be available. Then log in as a user with Full Control and confirm that all management options are accessible.
Conclusion By combining Security Groups with SharePoint's permission model, organizations can establish a scalable access management framework that reduces administrative effort, simplifies onboarding and offboarding, and improves governance. As environments grow, managing permissions through groups rather than individual users becomes a critical best practice for maintaining security and consistency.
Frequently Asked Questions
1.What happens if I need to give a specific user Edit access without making them a Full Control administrator?
You can create an additional security group with Edit or Contribute permissions, or you can grant Edit permissions directly to that individual user on the list. The key is to be intentional about every permission entry and to document who has what level of access.
2.Will breaking permission inheritance affect other lists on the same site?
No. Breaking inheritance on a specific list only affects that list. All other lists and libraries on the site will continue to inherit permissions from the site as usual. This is one of the key benefits of unique permissions. It allows you to apply granular access control exactly where you need it without disrupting anything else.
3.What if I accidentally remove my own access while cleaning up inherited permissions?
If you are a Site Collection Administrator, you will always have access to every list on the site regardless of list level permissions. If you are not a Site Collection Administrator, you may need to ask someone with higher level access to re-add you. As a best practice, always confirm that your own account has Full Control before removing other entries.
4 .How do I handle onboarding and offboarding with this model?
This is where the model truly shines. When a new employee needs access, the group Owner simply adds them as a Member of the security group, and they automatically receive the correct permissions on every SharePoint resource tied to that group. When an employee leaves, removing them from the group revokes their access everywhere. There is no need to visit individual lists or libraries.